

Everything You Need to Know About How to Tier a Cake
No matter how great a baker you are or how confident you are in your skills, there are still some baking-related projects that feel pretty intimidating. Making a multi-tiered cake can be one of those things. But knowing how to tier a cake can give you that extra confidence boost you need in order to take on the challenge.
Whether you’re making a wedding cake, baking for a large party or event, or just looking to tackle a new-to-you baking project, understanding how to tier a cake helps set you up for success. Here, we have a step-by-step guide for how to tier a cake, where to get your materials, what you need to know if you’re covering your cake with fondant vs frosting, and more. Let’s dive in and make sure you’ve got all that you need to know to stack your future showstopper.
Why Make a Tiered Cake?
If you’re just making a cake for your close family or a small group of friends, you may not need to go for something with multiple tiers, but if you’re baking for a crowd (or for a super-formal event), making a tiered cake can be a more elegant solution than a sheet cake and a better use of time and space than making a bunch of smaller cakes. No matter the reason you’re opting for a tiered cake, there are tips and tricks that you’ll need to know to help you execute your vision, but never fear, we’re here to help.

The Tools You’ll Need to Tier a Cake
If you’re going to attempt to make a tiered cake, you’ll need to be prepared. Here’s what we’d recommend gathering before you get started:
Cake boards (or cardboard cake circles): These are non-negotiable. Each tier needs its own sturdy base.
Dowels or supports: Wooden dowels (make sure they're food-safe dowel rods) and other supports keep your cake more stable and help you to build higher. They help support the weight of the cake so don’t skip them, particularly if you’re just starting to develop this skill. You can also use plastic dowels, boba straws, or other food-safe supports.
Buttercream or ganache: This will act as a sort of glue to help give a bit more stability to the cake. Not only that, but you’ll want it on hand to help you hide and seams, blemishes, or mistakes, and to give your cake a more polished look overall.
Large offset spatula, cake scraper, and bench scraper: These tools will make it easier for you to create a smooth, polished, professional-looking finish. Plus, they come in handy for tons of other baking projects, so you won’t regret picking them up.
A level: From the toolbox! (Make sure you get a new one or clean your level thoroughly - you don’t want to contaminate your cake.) Don’t trust your eyeballs—stick with something solid.
Tiering with Frosting vs. Fondant: Which One Should You Use?
Now that you’ve gathered your cake tiers, dowels or supports, cake boards, and other tools, you’ll want to think about how the tiering process might look a little different based on if you’re covering the cake in fondant or frosting it all with a fluffy buttercream. Here are our tips for tiering with frosting vs fondant so that you can feel like you’re going in prepared.

Tiering with Frosting (Buttercream, Ganache, Whipped Cream Frosting, Cream Cheese Frosting, and More)
Buttercream Cakes Are Best For: Rustic, modern, or semi-naked cakes or cakes with a softer, more homemade look
What to know:
Buttercream frosting (especially Swiss or Italian meringue) provides a smooth, delicious base.
Ganache is a great option for extra structure—it firms up beautifully when chilled.
Whipped frostings (like cream cheese or stabilized whipped cream) is risky—it’s soft and can shift.
Needs to be properly chilled before stacking for stability.
Can be trickier to transport, especially in hot weather.
Pro Tips for Frosting-Tiered Cakes:
Chill before stacking: Always refrigerate each tier until firm before assembling.
Make sure you create a buttercream border: If you’re filling your layers with a softer filling (like pastry cream, jam or preserves, or caramel sauce), make sure you’re piping a thick buttercream border around the edge of the cake to keep the filling from seeping out the sides.
Don’t skip the cake boards and dowels: Stability is the name of the game when it comes to tiering a cake, and soft frosting can sometimes require a little extra backup.
Careful when moving the cake: If you’re going to be transporting your completed cake, make sure you’re doing so super carefully. Frosted cakes can shift a bit more easily. Fully chilling your cake before trying to move it can give you a bit of extra support.
Go with frosting if… you love a soft, natural look and don’t mind a little extra care in transport.
Tiering with Fondant
Fondant Cakes Are Best For: Wedding cakes, sculpted cakes, ultra-smooth finishes
What to know:
Provides a firm, polished look with crisp edges.
Helps seal in moisture, keeping cake fresh longer.
Adds extra structural support—fondant-covered cakes hold their shape better.
Works better in warm weather since it’s less prone to melting (though heat can still pose a problem, so it’s a good idea to try to keep your cake cool).
Requires a smooth buttercream or ganache layer underneath (fondant doesn’t stick to bare cake!).
Pro Tips for Fondant-Tiered Cakes:
Roll it thin: Thick fondant is heavy and can weigh down softer cakes.
Chill the cake before covering with fondant: Working with a cold cake is often easier when you’re dealing with fondant. Plus, a chilled cake is firmer and won’t bulge like a softer cake can.
Watch out for humidity and extra moisture: Fondant absorbs moisture and can get sticky—use a dehumidifier if needed.
Go with fondant if… you want a smooth, flawless look and need extra stability, especially for multi-tiered wedding cakes.
So Should You Use Frosting or Fondant?
Want a soft, natural look? Go with frosting.
Looking for a flawless, polished finish? Both will work, but fondant might be a better bet.
Worried about stability? Fondant-covered cakes tend to hold up better.
How to Tier a Cake, Step By Step
Step 1: Bake, Cool, and Chill
Make sure you bake your cake layers well in advance so that you have time for them to fully cool and then chill before you start to assemble and stack your tiers. Softer cakes will be more difficult to stack because they can squish and collapse. Choosing a recipe that results in a sturdier cake and making sure there’s enough time to chill the layers will help.
Once they’re cooled, trim, then level the cake layers. Then wrap the cake layers tightly in plastic wrap and pop them in the freezer until you’re ready to assemble your cake. Cold cake is easier to work with. Though some people choose to just chill the cake layers, at ECBG, we put ours in the freezer, and that is what I recommend.
Step 2: Level the Cake Layers
Whatever you do, don’t just start stacking! You need to make sure your layers are level so that your cake will be even when you’re all done assembling and decorating. Use a serrated knife or cake leveler to trim the domed top off each cake layer.
Pro tip: Save the cake scraps for snacking or even turn them into cake pops. No need to pitch your excess cake!
Step 3: Assemble Your Tiers
Start by spreading a little bit of frosting on your cake board, then place the bottom of the cake (the first layer of cake!) on top of that. Fill, frost, and build each tier until you have them all assembled. Each tier should have a cake board (the same diameter as the tier) underneath it. The dowels that you use to support each tier will support that cake board instead of the cake itself. Use a small amount of buttercream to attach the bottom tier’s cake board to another cake board that’s about 2 inches in diameter larger than the cake itself. This way, you’ll be able to move the cake in and out of the fridge without ruining the cake or making a mess.
Once you have each tier ready to stack, apply a crumb coat—a thin layer of frosting over the whole tier to lock in any crumbs so they don’t get into the final layer of frosting—and transfer them to the fridge to chill until firm. If you’re covering the cake with fondant or applying a final layer of frosting, now’s the time. Chill it again before moving on to the next step.
Step 4: Insert the Dowels or Other Supports
Measure the wood dowels to the height of the bottom tier (the best way is to just hold a dowel, straw, or wooden skewer up to the layers of cake) and then cut them to size. The top of the dowel should reach the top of the tier. Place the dowels into the tier so that they’ll help to support the weight of the next tier you’re going to place on top. Dowels and other supports can play a huge role in keeping your tiered cake looking its best. At ECBG, we also put 1-3 dowels through ALL tiers and into the cake board after stacking a tiered cake in order to secure them all together and to the board. This technique gives a little extra security.
Step 5: Stack the Tiers
Place the second tier (on its cake board - you’re not taking any of the tiers off the cake boards) on top of the dowels. Repeat until you’ve stacked all of the tiers and you have one tall, multi-tiered cake.
Step 6: Decorate Your Cake
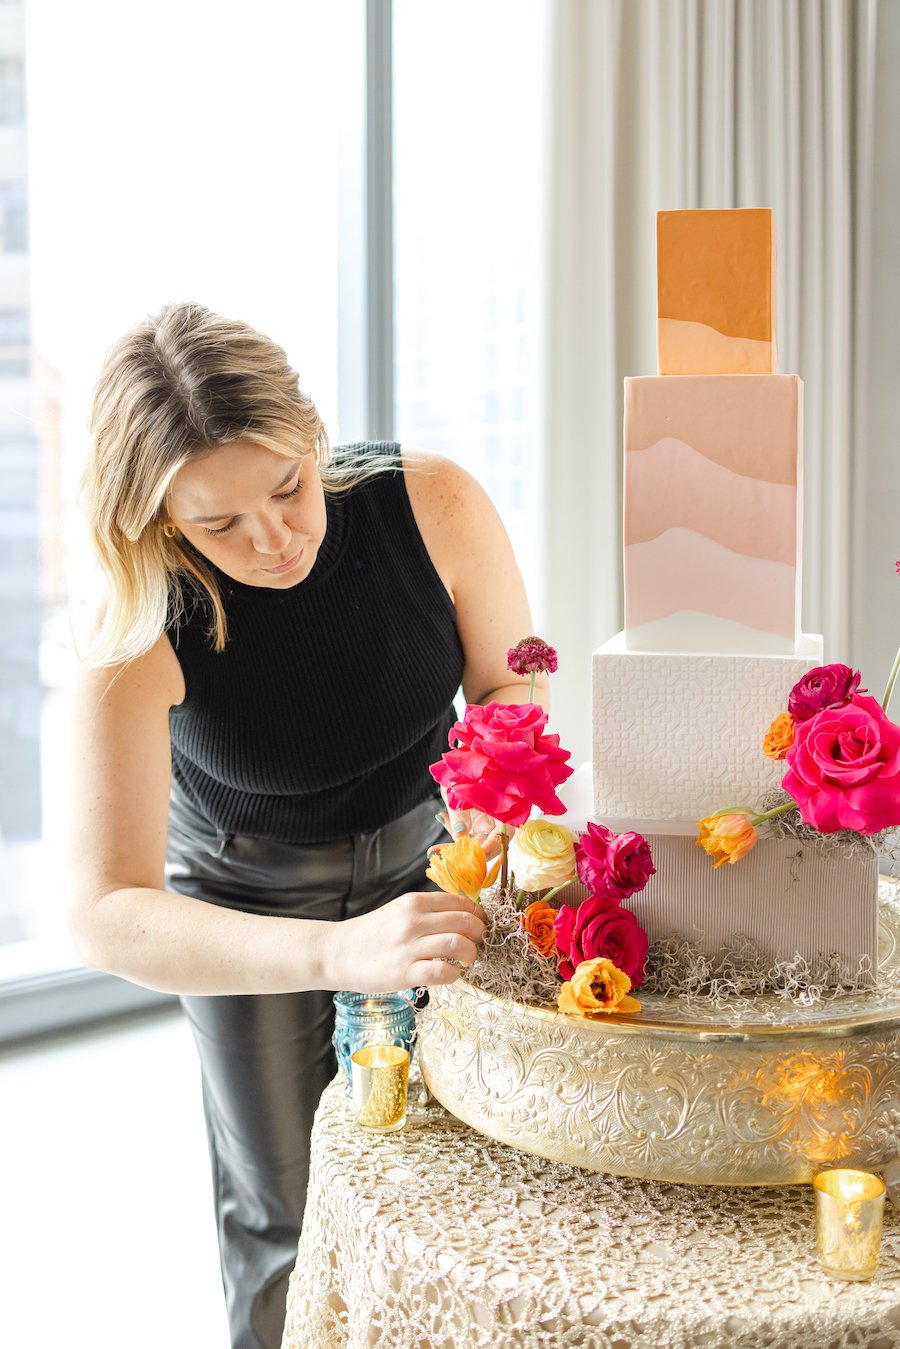
Once you have the cake fully assembled, it’s time to decorate. Add piping, flowers, sprinkles, or whatever else you’d like.

A Few Extra Tips to Set You Up For Success
Transport with care: If you’re moving your cake after it’s all assembled and decorated, make sure you have what you need in order to get your cake to the location safely. Use a sturdy box, cake carrier, or whatever else you need to keep it in pristine condition.
Practice makes perfect: Making a tiered cake can require a real learning curve. Your first cake might not be professional-level, but we’ve all been there. As you get more experience with the steps, your cakes will get better and better!
Chill before serving: Once you’ve finished putting your cake together and decorating it, chill the cake. Before you serve, pull it out of the fridge and let it come to room temperature.
Where to Buy the Supplies You’ll Need
If you’re ready to take the leap and try your hand at making a tiered cake at home, you’ll need to have the right tools to help you give it your best shot. There are tons of different places you can get the supplies you’ll need, but here are a few of our favorites:
1. Online Retailers
Amazon: Shop Erin’s favorite tools here. (Affiliate links)
Wilton: A cake supplies classic. Their website has everything from support rods to fondant tools.
2. Brick-and-Mortar Stores
Michael’s: A great option for Wilton-brand supplies, cake boards, and food-safe dowels. Plus, they often offer coupons.
Local Cake Supply Stores: Check your area for specialty baking stores—they often have unique items you won’t find at big-box retailers.
3. Restaurant & Baking Supply Stores
Webstaurant: Bulk baking supplies and heavy-duty cake boards for serious cake tiers.
Sur La Table: High-end baking tools and specialty products.
4. Grocery Stores
Walmart/Target: These stores will have a more limited selection than some of the others on this list, but you can usually find cake boards, piping bags, and maybe even some food-safe dowels.
Your Local Supermarket: In a pinch, it’s worth checking the baking aisle for basic supplies or the floral or produce section for cake-safe fresh flowers.

FAQs
-
Dowels are your best friend when it comes to making sure your cake stands tall and doesn’t collapse! Use at least 3-4 for small tiers and more dowels for larger tiers. As always, make sure your cake layers are chilled and you’re using cake boards for extra stability and support!
-
If you don’t have dowels or can’t find any, you can instead use thick plastic straws (like bubble tea straws). Make sure they’re fresh and clean, cut to the right height, and that you use enough of them to keep your cake from collapsing.
-
Yes! Every tier will need its own cake board to keep the cake stable (and make it easier and more convenient to stack). If you skip the cake boards, you’ll likely end up with a leaning cake. Not good!
-
Buttercream and ganache are better choices than whipped frostings like cream cheese or whipped cream. They’re sturdier than the whipped options and hold up well even with stacking.
-
Sometimes, despite your best efforts, your cakes might tilt a bit. While that’s obviously not ideal, it’s not something you should panic about when you’re first dabbling with tiered cakes. If it’s only slightly leaning, you can usually just make some adjustments to the dowels and other supports. If your cake is seriously crooked, it may be time to (carefully) unstack your cake and make sure each tier is level.
You can do your best to avoid tilting by using a level to check that each cake layer is even before you start stacking and assembling
-
Yes, but make sure you’re working on a short timeline. You can stack your cake about a day in advance if needed. Make sure to keep the stacked cake refrigerated and add any final delicate decorations when you’re closer to serving time.
-
Though it can be scary to see your cake start to sweat after refrigeration, you don’t need to panic. Let the cake sit out at room temperature for about 30-60 minutes. Any condensation on the cake should evaporate during that time, as the cake comes to room temp. Make sure you don’t touch or mess with the frosting, however, because that’ll make things much worse (and is more difficult to fix).
With a little patience, some precision, and a whole lot of confidence, you’ll master how to tier a cake like the superstar baker you are. Remember, every wobble is a learning moment, and every finished cake is a reason to celebrate.
Ready to take the plunge and learn about cake decorating from the pros? Take a cake decorating class with us! Check out online classes here or join us in-person.
Feel like the whole “how to tier a cake” process is just more than you want to take on? Let the pros handle it! Reach out to chat about wedding cakes or custom cakes and let us help make your vision come to life. Or, shop our Cake Shop cakes.


